Showing posts with label In the Kitchen. Show all posts

Melt-in-the-mouth Coffee Cookies

I have saved loads of recipes from this member, Jennifer Tan, in the Fun with philip airfryer facebook group. She's a genius baker. 

Well. I finally got down to doing something easier. Lol. The others either I have problems with the ingredients or the bake ware.  

Coffee cookies. Airfried. Go try. It's YUM. At least for me. Heh. 


Only 5 ingredients. I love simplicity. 


Ingredients : 
125g salted butter ( room temp ) 
60g icing sugar 
150g potato starch 
100g cake flour 
1 tbs coffee emulco 
Almond ( for topping ) 

Instructions : 
In a mixing bowl mix butter , icing sugar n coffee emulco till well combine with a spatula. 
Add in potato starch and cake flour mix to form a soft dough. ( half way i use hand with glove )
Roll to about 1 cm thickness .
Use a cookie cutter to cut it out .
Add d almond on top. 
Transfer to the baking pan lined with baking paper. 
AF 160deg for 18mins .
After the cookies were baked, transfer to a cooling rack for cooling. 
Cooled completely before store in an air tight container .
Happy Baking ๐Ÿ˜‹ ๐Ÿ˜ ๐Ÿ˜„
Recipe share by : ๐ŸŒป Jennifer Tan ๐ŸŒป


Luncheon meat chips

I airfried some luncheon meat chips today. The recipe had been saved for a few days but I only got down to do it today. Really yummy and crispy. I hope they will last ans stay crispy. 

The recipe is posted by a member of the facebook group, Fun cooking with Philips airfryer. 


A night before making the snack, remove the luncheon meat from the can and freeze it overnight. 

Method
1. Preheat the airfryer at 180 degrees for 5 mins 
2. Use a vegetable/fruit peeler and shave the luncheon meat into paper thin slices
3. Layer the shaved luncheon meat into the basket (do not overlay or overcrowd the basket)
4. Air fry for 5 mins at 160 degrees for 3 times. 
5. After every 5 mins try to breakup the sticking luncheon meat. 
6. Divide the luncheon meat into several batches.
7. When done, cool and store into airtight container. 

** Frozen luncheon meat is to ensure that the shavings be thin. 

Pineapple tarts

We spent our Sunday making pineapple tarts. Since we do not have the traditional pineapple tart shape mould, we just used the Pooh and Tigger cookie cutter. 


Cute huh. But the shape is alittle difficult to handle with the dough. Alittle ugly, but still cute and tasty. 


And since the first batch was such a success and we had so much pineapple paste left, we made batch 2, but in the pillow form. They taste just as nice. 


Gosh. Pineapple tarts overdose now. Lol. We made about 95 tarts in total. Woah.


Prep time
60 mins
Cook time
15 mins
Total time
75 mins
Serves
~45 tarts

Ingredients
  1. 125 g butter
  2. 420 g pineapple tart jam
  3. 200 g plain or all-purpose flour
  4. 20 g corn flour
  5. 1/4 tsp fine salt
  6. 1 large egg yolk
  7. 1/2 to 1 tbsp cold water
  8. 40 g icing sugar
  9. Egg wash (1 egg yolk and 1 tbsp water)
Method
  1. Sift and mix flour, corn flour and salt to a large mixing bowl. 
  2. Rub cold butter into the flour with fingertips.
  3. Add egg yolk, cold water and sugar. Gently knead to a soft dough (do not over knead).
  4. Divide dough to 4 small portions. Wrap each portion in cling film, and chill in the fridge for 30 minutes to firm it up.
  5. Meanwhile, weigh and shape the pineapple jam to 6 gram balls.
  6. After 30 minutes of chilling, take out one portion of dough, at a time, from the fridge.
  7. Dust work surface and rolling pin with flour. Roll the dough to 7 mm thickness.
  8. Dust the mould with flour before cutting out the tart shells. Brush tart shells with egg wash.
  9. Space tart shell 1 cm apart on baking tray lined with parchment paper.
  10. Bake the tart shells at 180°C (356°F) middle rack for 10 minutes.
  11. After baking, place a ball of pineapple jam on the cavity of each tart shell.
  12. Return tart shells back to oven to continue baking for 5 minutes until golden.
  13. When the pineapple tarts are cooled, store them in an air-tight container.

Tonight's dinner

Today I made dinner. Nothing fantastic. But I'm proud haha..


Korean Tteokbokki

Tonight's dinner menu was Korean Tteokbokki. Spicy ricecake with egg, some pork and green onions. Kind of a failure, as it was way toooooo spicy. Friend mentioned that the chilli paste is not spicy at all, so maybe I got too generous. Oops.

Recipe is from http://www.maangchi.com/recipe/ddukbokkie. But I skipped quite alot of ingredients. My cooking style: anyhowcookanyhoweat. Haha oops. 


Here's what went into tonight's dinner. 

- 500g rice cake (bought from NTUC)
- 1/3 cup chilli paste 
- 4 cups water
- 2 stalks green onion
- 2 hardboiled eggs 
- 7 ikan bilis 
- some pork

I improvised the ingredients but the method used is the same as the recipe. 

Next attempt, lesser rice cakes, lesser chilli paste. Burning mouth and tongue >.<


Pear Pork Wedges

Tonight's dinner highlight is Pear Pork Wedges. Done using the airfryer. A very simple yet tasty dish. Recipe is from the Airfryer recipe book that the hubs bought for me.. us.. haha.. He cooks too... Way better than me.


The ingredients are simple too.
  • 1x Chinese Pear
  • 8x Pork Belly Slices
  • Some salt
  • Some pepper
Method
  • Core and peel the pear. Cut into 8 pieces
  • Wrap the pork belly around each piece of pear. Hold with a toothpick.
  • Sprinkle with salt and pepper (I FORGOT to do this. OMG)
  • Airfry the pear pork wedges at 200 degree Celsius for about 8 minutes. Flip the wedges midway.

Very tasty dish. Even though the photo is not that tasty looking. I was messy and hence the photo looks messy too LOL. The hubs gave a thumbs up, even though I forgot about the salt and pepper. Sighs. Silly me.

ๅ…ƒๅฎต่Š‚ๅฟซไน

It's the last day of the Lunar New Year. A day for more reunions.

Since it's the 15th of the lunar calendar, the hubby made vegetable curry for dinner, to go with white rice. Yum yum. But maybe a little too spicy. 


Happy 148!

Also, time to open her baby's red packets? She loves her angpows. She complains when I removed the wet, slobbery one from her hands. Duh... She made me feel like a bully. 


Happy Valentine's Day

This year's Valentine's Day is a 3 human and 1 dog affair. Haha. 

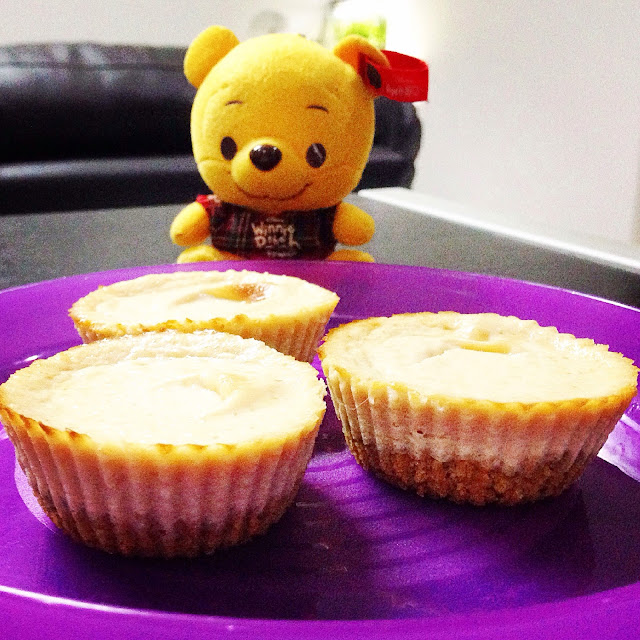
Hubby gave me a Hoodie Pooh at midnight as this year's v day gift. Cute! LO likes it too. Lol. I did not get anything for him but made him mini cheesecake (cupcake size). 


After LO's nap and milk, we headed out for lunch. It was 2 plus when we reached. It became a pretty late lunch. I was craving for Taiwanese food, so we settled at Lee's Taiwanese. Not sure why, but LO fussed alot to sleep while we waited for our food. I am guessing the loud music (though usually she will just sleep through when in her carrier) and the talking from nearby tables. 


Desserts was llao llao softserve. Yummy. I can eat more. Let's have more soon!! Yummy~ This big cup cost $6.90 (If I didn't remember wrongly). With chocolate, almond nuts and fruits. I like the softserve and almond nuts. Fruit I can do without in this case. Chocolate is nice, but the person drizzled lots on the spoon and stuck there after hardening. Duh. Wasted!


We window shopped a little in the 3 connecting malls and grocery shopped for dinner. The hubby is cooking. Yay. Seafood pasta with scallops and mussels. The seafood were from Big Box and not very expensive. We intended to get the alaska king crab legs. But... It's huge. I doubt any of our pots is able to fit it in. Haha...


The day was ended with homemade mini cheesecake (in a cup) that I made the day before. Hmm I'll try the nobake version next time. LO always wanted attention at the time when I have to look after the oven for any sign of overcooking. Haha.. 


Happy Valentine's Day!

Bah Kwa

Decided to try out making my own bah kwa after seeing Baking Taitai's recipe, especially since I have most of the ingredients. That's one criteria when cooking or baking from a recipe. I hate to buy stuff that we would only use that one, two occasions.

Here's my successful batch:


First attempt. TOO thick. Omg. It's like meat patty.


Second attempt still too thick (but not as crazy as the first) and maybe of the uneven thickness, some parts got burnt.

Third attempt, success. Looks good. Taste is there but of course not as good as the pros.
All three attempts were done in one batch of ingredients as per the recipe. My oven is pretty small. So I divided them and it's good since I can trial and error. But of course, it's very electricity consuming (oopsss).

The only ingredient that I did not use was the cognac/alcohol. None at home. Or rather. The cognac is not opened. Haha. Maybe that's the taste that is missing.

A few days after I attempted this, Baking Taitai came up with another recipe using pineapples (Baking Taitai's Pineapple Bah Kwa). Maybe I will try that... Maybe. But I will need my little boss's approval. Haha... Tight and busy schedule from her.


From Baking Taitai
http://bakingtaitai.blogspot.sg/2014/01/homemade-cognac-bak-kwa-chinese-pork.html

Ingredients:
  • 100g brown sugar 
  • 1 tbsp premium light soy sauce 
  • ½ tbsp fish sauce 
  • 1 tbsp premium oyster sauce 
  • 1 tsp premium dark soy sauce 
  • ¼ tsp Chinese five spices powder 
  • ½ tsp salt 
  • 500g minced pork (with some fat for greater taste)
  • Honey Glaze (for brushing on the cooked slice pork)
    1 tbsp honey dilute with 1 tsp water 

Method
  • Put the first 7 ingredients in a bowl and mixed well into a sauce. 
  • Place the minced meat in a big mixing bowl and pour the mixed sauce into it and start mixing together with a pair of chopsticks. 
  • Blend and stir the mixture in one direction until the meat becomes gluey. (this is important, otherwise the meat will break up) 
  • Store in the fridge for several hours or overnight.  
  • Spread the marinated minced pork thinly onto the baking tray lay with parchment or non stick baking paper. 
  • Bake at pre-heated oven at 130C for 12 mins. After the meat is cooked at this stage, remove from oven. Increase the oven temperature to 200C.
  • Cut the cooked meat into 9 pieces or any desired size. Flip to the opposite side and brush the meat with the honey glaze.  
  • Put the tray back into the oven. Grill one side for 8~10mins, remove from oven, flip over to the other side, brush with honey glaze before putting it back to the oven to grill for another 6~8mins or until golden brown with slight burnt. 
  • Once done, let it cool and enjoy!

Homecooked ็‚ธ้…ฑ้ข

The hubs made me lunch today. He's not working today as we had to bring our LO to an important milestone at the polyclinic. Her 3 month screening and vaccinations.

It's ็‚ธ้…ฑ้ข. And it's DELICIOUS. Yumss..


Breakfast with love

The hubby today made me breakfast. Yummy... Egg in the center bread.
Thank you hubby.


Snow Skin Mooncake

It's the Mid Autumn Festival today! Time for lanterns, candles, sparkles, mooncakes and the big, round and bright moon.


Following our traditional baked mooncakes, little sister and I went on to make snow skin mooncakes during the weekends. We decided to make two flavors and we had 51 mooncakes in total at the end of the day. Both of us were spent at the end with serious back ache. Haha..


With the remaining of our colored dough, we combined them and made ONE colorful Doraemon snow skin white lotus mooncake. The effect looks good. I was saying to my sister that we should just make colorful ones next year.


Based on the feedback, I think we were quite successful. Her colleagues love it, and even my father and brother who are usually wet blankets in our baking or creations, said that it's nice. Yippie!


Recipe
(from: http://yinhomemade.blogspot.sg/2013/09/easy-to-make-snow-skin-mooncake.html)


Total time
120 mins
Serves
Makes 26 55g Mooncakes

Ingredients
  • For the Snow Skin
    • 150g roasted glutinous rice flour (Gao Fen)
    • 150g icing sugar
    • 50g shortening
    • Approx 180g cold water
    • Food coloring
  • For the Moon Cake Filling
    • 910g White Lotus paste (bought the readymade from Phoon Huat)
Method
  1. Sift the cooked glutinous rice flour and icing sugar in a mixing bowl.
  2. Add in shortening to the flour mixture, combine the mixture, add in cold water and knead into dough form. 
  3. Add drops of food coloring and knead the dough with your hands so that it comes together to become soft dough.
  4. Divide dough, flatten the ball of snow skin and roll out until you get a thin circle. 
  5. Place the ball of filling in the center of the dough and seal the filling with the snowskin dough by wrapping around the fillings with your hands.
  6. Dust the snow skin ball with cooked glutinous flour
  7. Place snow skin ball into mooncake mould and press down on the lever hard so that the moon cake shape is formed and the face plate makes imprint.
  8. Press to release and moon cake. Repeat with the remaining dough.
  9. Chill before serving.
The mini mooncake are done using the ratio of 20g dough to filling 35g.


Nutella Oreo Brownies

PS. Sorry for the lousy photos. I made these at night and the lighting was bad. 

I was going to a girlfriend's mini housewarming the next day, I had decided to make some desserts since she was cooking. With not alot of ingredients at home, I decided to make Nutella Oreo Brownies.


I had made Nutella Brownies the other time, this time, I added in Oreo cookie.


To be honest, I love it. Nutella Oreo Brownie taste simply delicious. I believe young kids would love this. And maybe with a scoop of vanilla ice cream, it would taste even better. The brownie taste nicer when it's freshly out from the oven. It still taste nice over night, but the freshly baked crunchiness and warmth adds points to the taste. 


The oreo cookie that is inside when cut opened. 


Recipe
(From: http://www.butterbaking.com/2012/02/10/oreo-and-nutella-brownie-bites/)


Prep time
20 mins
Cook time
12 mins
Total time
32 mins
Serves
Makes 6 brownies

Ingredients:

  • 140g Nutella
  • 1 eggs
  • 5 tbsp plain flour
  • pinch of salt
  • 6 Oreos

Method

  • Preheat the oven to 180 C
  • In a medium bowl, mix together the Nutella, eggs, flour and salt.
  • Scoop a small tablespoon of the Nutella mixture into each cupcake liner. 
  • Top with an Oreo. 
  • Divide the remaining Nutella mixture among the 6 liners.
  • Bake for 12 minutes. 


Just another "Today"

Happy that I procastinated in going out for some errands as I managed to catch the postman with my ASOS loot. One for the hubby. Two for me. 


And I had made dinner today. Simple noodles with chicken, broccoli and carrot. Healthy. I hope. Looks pretty and colorful. Lol


Steamed Corn Cake Cups (version 2)

After my first attempt of making Steamed Corn Cake Cups, I had decided to try again, this time with another recipe from http://www.misstamchiak.com/recipe-sweet-corn-cake/. The Corn Cups looks really good in her recipe. I had hoped mine is just as good.


Review
This second version of Steamed Corn Cake Cups definitely taste better. Hmm.. I should try the creamy corn as used in the recipe. I had leftover corn kernels, so I just use it. And the recipe requires 2 eggs, but I realised I only left one in the fridge. OMG. Maybe that's why the Steamed Corn Cake Cups looks so... rough? Oops..


Recipe
(From http://www.misstamchiak.com/recipe-sweet-corn-cake/)


Prep time
15 mins
Cook time
30 mins
Total time
45 mins
Serves
Makes 6 steam cakes

Ingredients:
  • 1 egg
  • 70g sugar
  • 100g corn
  • 125g plain flour
  • 1 tsp baking powder
  • 40g melted butter
Method:
  1. Whip eggs and sugar until light and fluffy. 
  2. Add in creamy corn, mix until well-blended.
  3. Fold in plain flour and baking powder, mix until well blended. 
  4. Add in butter, mix until well-incorporated.
  5. Pour the mixture into greased and floured cupcake mould.
  6. Steam for 30 minutes.


Traditional Black Sesame Lotus Mooncakes

I was doing some online shopping a few months back, and I thought that, since the next festival is the Mid-Autumn Festival, why not get some mooncake moulds and make some mooncakes?

Here are our mooncakes after resting for about 3 days.


Here is the mould and the changeable designs that I had bought from online. The two character patterns are not really suitable for baked mooncakes as the imprinted design on the mooncake looks faded after baking. The rest are pretty.


Roped in my little sister in for this project and we got most of the ingredients from Phoon Huat.
https://www.finedininglovers.com/recipes/dessert/chinese-food-mooncake-recipe/


Review
It took us quite a long time to complete two batches. Why two? I didn't really want to keep the filling, hence suggested to use finish the fillings. And we were both rookies is wrapping and sealing the fillings in the dough. The dough was quite thin and some parts of the dough keep breaking. Overall it was pretty fun, and VERY oily. The dough was very oily. We were a little disgusted at our oily hands at some point. Haha.. But we were happy with our masterpieces. Looks pretty delicious. Taste not too bad.


The second batch of mooncakes has lots of dough left over. So we made bunnies. Although the initial plan was to make piglets, but the piglets look.... weird.


Recipe
(From https://www.finedininglovers.com/recipes/dessert/chinese-food-mooncake-recipe/)

Prep time
90 mins
Cook time
10 mins
Total time
100 mins
Serves
12 x 50g moon cakes

Ingredients
  • For the dough
    • 100g All-purpose Flour
    • 60g Golden syrup
    • 1/2 tsp Alkaline water
    • 2 g Vegetable oil
  • For the filling
    • 420g Black Sesame Lotus seed paste
  • For the egg wash
    • 1 Egg yolk
    • 2 tbsp Egg white
Method
  1. Use a large bowl, mix the golden syrup, alkaline water and oil well. Sift in the flour. Use a spatula to combine all ingredients. Don’t over-stir. Knead into a dough. 
  2. Cover dough with a film wrap and rest for 40 minutes.
  3. Cut into 12 equal portions, each 35 grams. Roll each portion into a ball shape. Set aside.
  4. Preheat oven to 180°C. 
  5. Prepare the egg wash: whisk the egg yolk with the egg white. Sift through a fine sieve.
  6. Divide the dough into 12 equal portions. Roll each portion into a small ball shape. Cover a dough portion with a plastic film and roll into a thin disc. 
  7. Wrap and seal the lotus paste ball with the dough disc. Spray the mooncake mould and place the stuffed mooncake into the mould. Lightly press the mould handle, then remove the mooncake from the mould. Transfer the stuffed mooncake onto a lined baking tray. Repeat this step to finish the remaining dough and lotus paste
  8. Bake in the preheated oven for about 5 minutes. 
  9. Brush the mooncakes with egg wash. 
  10. Continue to bake until the pastry turns golden brown. 
  11. Remove from oven and let cool on a wire rack. Store in an air-tight container. 
  12. The pastry will become soft and shiny in one or two days.

Steamed Corn Cake Cups

After all that baking and feeling sinful, I had decided to try a less sinful way of making cakes. Steamed cakes.

Referencing this recipe, http://www.justonecookbook.com/recipes/steamed-cake/, I steamed my first batch of Steamed Corn Cake Cups.


Prep time
12 mins
Cook time
8 mins
Total time
20 mins
Serves
Makes 4 steam cakes

Ingredients
  1. ½ cup (75g) all purpose flour
  2. 1 tsp. baking powder
  3. 1 egg
  4. 2 Tbsp. milk
  5. 2 Tbsp. sugar
  6. 1 Tbsp. vegetable oil
  7. ¼ cup corn kernels
  8. ¼ cup shredded cheese
Method
  1. In a medium bowl, combine flour and baking powder
  2. Whisk them about 20 times (This is a shortcut method for sifting).
  3. In a small bowl, whisk egg, milk, sugar, and vegetable oil together until combined.
  4. Pour the egg mixture into the flour mixture and mix until smooth.
  5. Add corn & cheese and mix until combined.
  6. Pour the mixture into the cupcake liners.
  7. Place the glass ramekins in steamer and cook covered on medium heat for 8 minutes. They're done when a skewer comes out clean without wet batter.
  8. Turn off the heat and remove the ramekins from the pan and let them cool. Serve warm or at room temperature.


Personally, I don't find it very successful. Hence I'm going to try another recipe for the next round. 

The Steamed Corn Cake Cups came out a little too hard. I guess alot more whisking is required at the egg portion. (Did a search online for the reason why my Steamed Corn Cake Cups are not soft and fluffy enough)

But I do enjoy my first batch of Steamed Corn Cake Cups. They taste pretty nice, just that the recipe needs more adjustments. To try again =D


Apple Cinnamon Infused (Detox) Water

The hubby saw a list of detox water (http://fooditus.com/10-top-rated-homemade-detox-water-recipes/) and asked me to prepare for him. Thing was, I already did that once and he kinda think that it's just water, even though I told him it's good for health.

I guess the keyword was detox water and not infused water. =.=|||

So today... I made Apple Cinnamon Infused (Detox) Water.


Source: 
http://www.loseweightbyeating.com/apple-cinnamon-water-recipe/

Ingredients
  • 1 Apple thinly sliced
  • 1 Cinnamon Stick 
  • Half pitcher of ice
  • Water to fill up the rest of the pitcher

Method
  1. Drop apple slices to the bottom of the pitcher and place in the cinnamon stick.
  2. Cover with ice about 1/2 way through and fill the rest with water. 
  3. Cool in the fridge for about an hour before serving.

Apple Cinnamon Water lasts for 24 hours in the fridge.

Okie.. the cinnamom is a little too strong and overpowered the apple. Guess I will not soak the cinnamom in the water for too long the next time.

Next to try, the Cucumber Lemon Mint or the Lemon Ginger.

Homecook Prawn and Sausage Penne with Tomato-Mushroom sauce

"Inspired" by GF, who was going home to make dinner, I went along to get some groceries to make dinner too. Doing a wee bit duty as a wife (Psst. I'm quite a lazy wife and cooking for two is a chore, especially with so much leftover ingredients unused.)

Simple dinner: Prawn and Sausage Penne with Tomato-Mushroom sauce.


Serves 2
Total Time 30 minutes

Ingredients
  • 2 sausages
  • 1 small canned mushroom
  • 8 pieces of prawns
  • 1 canned tomato 
  • 300g Penne pasta (It's a little more than for 2 pax as hubby was hungry)
  • 1 egg (Thinking back, it was very redundant)
  • Some oil
  • Some salt
Preparation
  • Slice the sausages into small slices
  • Dice the mushroom into smaller pieces
  • Deshell the prawns and toss for a little while in salt


Method
  • Pan fry the sausage slices in oil till the edges turn a little brownish
  • Pan fry the prawns in oil
  • Boil the penne pasta in water for 11 minutes. Stirring it frequently
  • Heat up the tomato sauce and add in the diced mushroom. 
  • Then plate up and dinner is ready


I had the intention to make the tomato sauce from scratch, but GF told me to just get the can. Which I'm glad I did. It is quite a hassle to do it from scratch. Haha..

At the end of the meal, Hubby says it's pretty tasty, though I feel that I should take out the penne a little earlier. I had tasted the pasta and felt it would be better if it cooked for another minute or two, but I should had just kept to 11 minutes. Oh and the egg is pretty redundant.

Successful attempt! Woohoo.. Kind of boosted my confidence, so maybe another meal soon? We'll see...

Nutella Brownies

Inspired by a GF who made Nutella muffins with a simple recipe, I went online and found this: http://www.instructables.com/id/Nutella-Brownies-Three-Ingredients/

Here's my end results. Not very nice looking. It needs more tweaking in timing.


Since it is my first attempt, I decided to cut the ingredients by half to try out.

Serves: 5

Ingredients:
  • 140g Nutella
  • 1 egg
  • 31g flour
Directions:
  • Put it in a bowl. Mash it up. 
  • Pour into muffin cups.  
  • Bake at 180°C for around 15 minutes 


At 15 minutes, my Nutella brownies look... overbaked. Haha..


After trying, it taste quite nice. It is soft on the inside, and a little crispy on the outside. Hubby also thinks that it taste nice.

I would have to lower the temperature and increase the timing the next time I attempt this.